
I love making cards in Cricut Design Space, and it is so easy to do using the Shapes function from Design Space! With the simple steps I am going to show you here, you can create a card for any occasion. So pick out some cardstock that goes along with your theme or event, and you can learn how to make a Cricut card for beginners.

By the way, this post contains Affiliate Links to companies I have partnered with, such as Amazon. As an Amazon Associate I earn from qualifying purchases. You can think of affiliate links like tipping your waitress, only it does not cost you anything extra! Thank you for shopping with my links!
Since there are so many different types of cards, I have decided to do a card making series. In this series of articles and videos I will share with you some card making tips and introduce you to a variety of card styles. For many of them, you can create the base of the card out of free basic shapes found in Cricut Design Space!
I also created a little game so that you can play along as we are making cards. Once a month I will pick a new winner in the #CardMakingBINGO game. Click on the button above to get all the details and check out my card making series of tutorials!
Supplies for Making Cards
At the very minimum, when you are making cards with your Cricut you will need some good cardstock. If your card involves a design with layers of colors or patterns, you will need some sort of glue or adhesive to secure those pieces and layers to each other. To make shopping easy for you, I have put a few suggested product into a shopping list that can be found in my Amazon store.
There are additional tools and supplies that are nice to have when making cards, such as the Cricut scoring stylus or scoring wheel. These tools will allow the Cricut to place a scoreline, which is the crease or fold line of the card. I also like to use a bone folder to help me get a really good crisp fold on my scorelines.
The Cricut pens are another nice tool to have for making cards. I like to use the pens to write on my cards, and I did a full tutorial about that process that you can read HERE. It is best to use a Writing Font when you are using the Cricut pens. But, if you do want to use a cutting font and change it to be drawn, you can also add a hatch fill to your font so that the Cricut will almost color it in. Click HERE to go to my tutorial about how to make your Cricut pens color in your lettering.
Card Sizes for Beginners
Before you start to making cards in Cricut Design Space first you should decide what size of card you want to make. There is no real right or wrong sized card, but their are some typical card sizes to match up with premade envelopes. The common greeting card are normally matched with what are called the announcement envelopes, and you will see their card and envelope sizes called out with an A at the beginning of the size. I feel that the two most commonly used card and envelope sizes are A2 and A7.
The A2 card is a smaller more compact card size. When it is unfolded, the card measures 5 1/2 inches by 8 1/2 inches. Once folded in half along the longer side, the overall card would measure 5 1/2 inches by 4 1/4 inches. When I am making cards, I have found that if I use one sheet of 8 1/2 inch by 11 inch cardstock and cut that in half, then fold each of those halves in half, it produces two A2 card bases.
The A7 card is probably the most common greeting card size. When it is unfolded, the card measures 7 inches by 10 inches. Once folded in half along the longer side, the overall card would measure 7 inches by 5 inches.
A more recent trend in making cards are Slimline cards, which are long thin cards that fit a business size envelope. Since you can purchase a large box of blank business sized envelopes at so many places this makes Slimline cards a great option for anyone making cards. When it is unfolded, the card measures 7 inches by 8 1/2 inches. Once folded in half along the longer side, the overall card would measure 3 1/2 inches by 8 1/2 inches.
Making cards in Cricut Design Space Using Shapes
When making cards in Cricut Design Space, you will be using the Shapes function in Design Space, so all of the parts are free to use. You will also learn how to use the scoreline to make the center crease in your card. You will learn how to use Align to center that scoreline on the card base, and Attach to hold the placement and position of the scoreline on that base.
Let’s get started! I am going to describe the steps as I show you the cards I made, and then at the end there will be a video that shows you how all of the steps come together.
First, I inserted a square using the Shapes function in Design Space.

Next, I clicked on the little padlock icon in the corner of the square so that I could make the square into a rectangle. I made my first rectangle 5 1/4″ by 7 1/2″, but you can make your base any size you want. Just make sure that the overall size of the finished card will fit inside of your envelope.
For an A2 card make this first rectangle 5 1/2 inches by 8 1/2 inches. For an A7 card, make this first rectangle 7 inches by 10 inches.

Next, I went back to the shapes button and inserted a scoreline.

I adjusted the length of this scoreline to match the width of my card base and made sure that it was rotated to be the same direction as my card base.

Then I selected both the card base and the scoreline and use the Align function and clicked Center. This perfectly centers the scoreline on the base of the card.

Attach the score line
Next we want make sure we hold that scoreline placement when we make the card, so with the card base and the scoreline selected I click on Attach button in the lower right corner of the screen. Attach holds the placement and position of an item. In this case we are holding the placement and position of the scoreline on the card base.

The other nice thing about using the Attach feature is that now if you want to resize this card, the scoreline will resize with the card. Additionally, your scoreline will stay perfectly centered in your card!
Add layers
Next, I made two more rectangles following the same steps as above (insert a square, unlock it and change the dimensions) The first rectangle will be slightly smaller than half of the base card. Your dimensions will depend on how much of a border edge you want showing of each card layer. For mine I went with 5″ by 3 1/2″.
From here, I duplicated that rectangle and then adjusted the size of the duplicate rectangle to be
4 3/4″ by 3 1/4″. Now I have a card base, and two card layers that I can stack on top of the card base.

Make sure to make each piece the color you would like it to be for the card, so that the Cricut will automatically separate them into different cutting mats for you. If you have a hard time selecting just one layer at a time try selecting things from the layers panel on the right. You can see in this image above that I have just the blue layer selected, since the background of that layer on the layers panel is darker. This allows me to pick just that layer, and then go to the top panel and select the color to change it.
Embellish your card
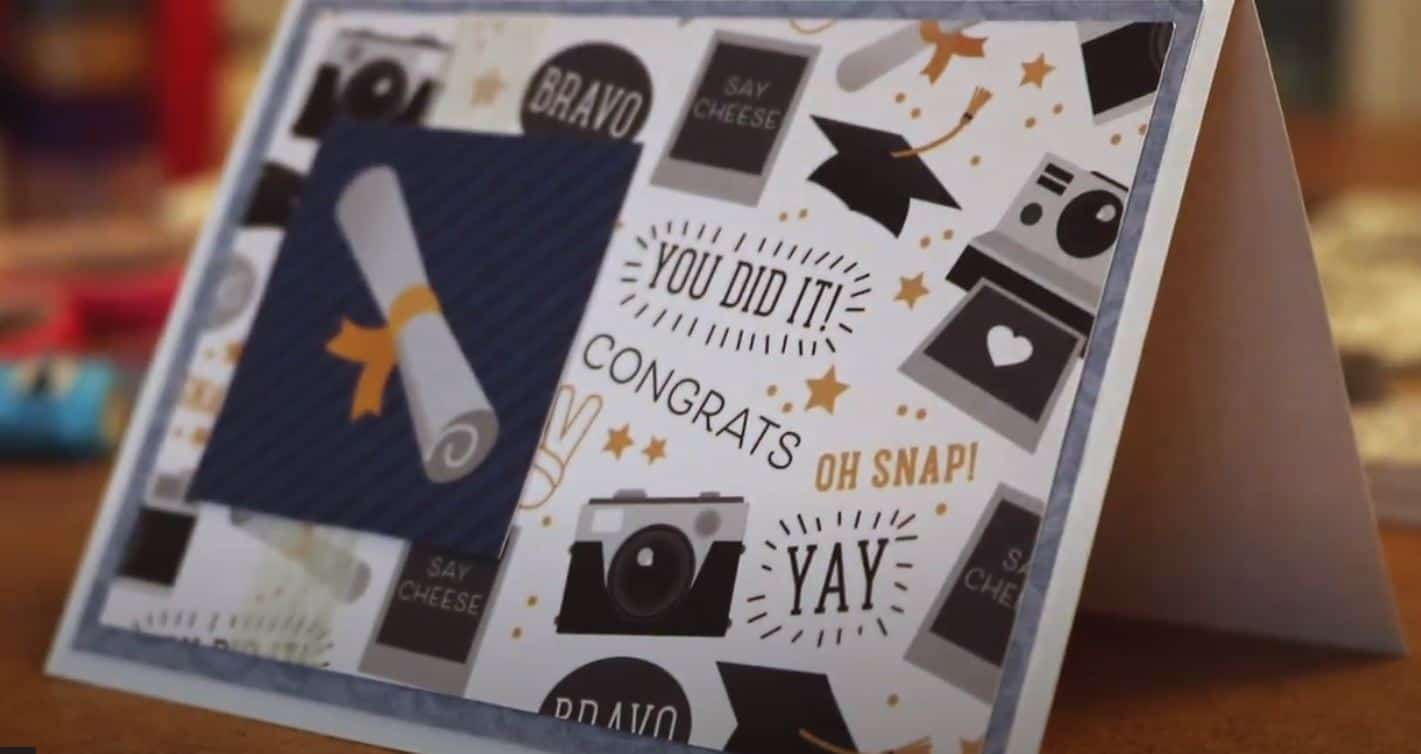
After you have cut and assembled the basic card, you can use image, stickers, washi tape and other embellishments to decorate the card like I did for the examples here. Each one is different, but all of them started with the same basic base.

Here is the video that shows all of the steps that I detailed out above come together.
If you want to use the Cricut Design Space file that I created for the base card you can click HERE to access that and add it to your projects, but my hope is that after reading this tutorial and watching the video you feel like you can create this same card base all on your own.
Display your cards
Once you are done making cards in Cricut Design Space you might want to display them. Some of my cards look like miniature works of art! If you would like a card easel to display your cards then I have the perfect project for you!
I recently found an online store for SVG files called Fable & Guild. This store is filled with Original SVG Cut File Art . . . yes, I mean art not just your ordinary svg files. These pieces are gorgeous!
Sue Reeves is the designer of these svg files. Her designs aim to have an art based approach where story and meaning become integral to the design. More importantly she strives to ensure our SVG cut file projects are simple, straight forward and enjoyable when making up. In this video I mention a few links. First off, here is the main link to the Fable & Guild Site https://fableandguild.com/
Enter ShawnMosch in the coupon box at checkout to get a 15% discount
If you have never used a svg file before, you can check out my tutorial HERE. Not only do I explain what a SVG file is, but I show you how to download them, access them from a zipped folder and then how to upload them to Design Space. I have one video showing this process on the computer and one on the iPad, but it is also helpful on other mobile devices.